So Saturday became a marathon cooking day. Carebear and I spent the day elbow deep in 5 million different kinds of flour combos trying to see what we could come up with.
I have to say, I have some frustrating moments, but mostly we had a blast. I wish I had taken some pics of my house. My table and my kitchen were a disaster area. Flour EVERYWHERE. Bowls, and measuring cups EVERYWHERE... I cannot say I am a neat cook. I did take some pics of the finished products.
We started the day with a recipe I found for bagels. She had used a baking mix, so I decided to use the AP mix I put together using Gluten Free Girl and the Chef 's cookbook. The dough felt so odd between my fingers. You see I was a big bread baker, the regular kinda bread. I have made tons of bagels in my day. These did not feel right. I could not work this dough. It just feel apart in my hands.
Enter Frustration. This is expensive flour. So I thought to myself, Self what is a girl to do??
So I dumped the dough into a bread pan, let it rise again and then jammed it in the oven. Gluten free Girl always says, you can always make breadcrumbs!!!
Well guess what--- Here is my Gluten Free bread-


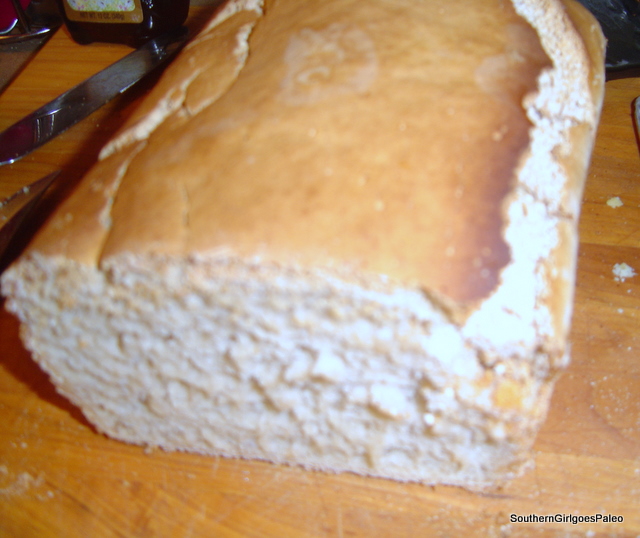
( I will have to do a pimento cheese spread post-very southern and so paleo!)
Basic Gluten Free Bread
4 cups all purpose gluten free mix ( I used Gluten Free Girl's recommended AP)
1 T sea salt
1 T yeast ( gluten free)
1 3/4 cup warm water
1/4 cup honey
Directions-
Proof your yeast. - This means add your yeast, your sugar and your water, mix well and let them sit for a few minutes until bubbly. So in this case, add water, honey and yeast, mix well and set aside.
Mix your flour and your salt well. Combine wet mixture will flour mixture until well combined.
(This mixture will still be rather runny, and not feel really much like a bread dough in your hands, but just TRUST at this point.)
Next, place in a clean bowl, cover with a damp cloth and place in a warm place to rise for an hour.
After an hour, punch down the dough, and transfer to a well oiled bread loaf pan. It will somewhat just pour in, still not looking much like a bread dough. Just stuff it in, and even out the top. Cover this with your damp towel and place it in a warm place for a second rising. After another hour, place your dough in a 425 preheated oven, with a ramikin,or small oven safe bowl, filled with HOT water sitting off to the side in your oven. This should take aprrox an hour, or until your dough is very browned on top, and sounds hollow when you wrap on it with your knuckles.
This produces a bread that is VERY VERY crusty on the outside and mosit on the inside.
So on to the next project- we made biscuits adapted from Flour Arrangements . They were called Big Buttermilk Biscuits.
Here are our biscuits:
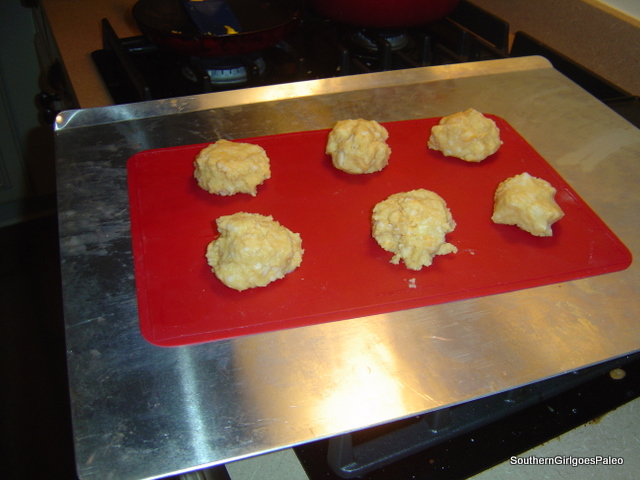

this above pic is before baking, below pic is after baking.
I myself thought they were a little grainy, but my family were big fans. I served them with country ham, and some with just butter and honey. My Dad, not a gluten free eater, he LOVED them. So I guess they were pretty good, I will do them again.
Big Buttermilk Gluten Free Biscuits
1 1/4 cup white rice flour
1/2 cup brown rice flour
1/4 cup + 2 tbsp tapioca flour
1/4 cup potatoe starch
1 tsp fine sea salt
1 tsp baking soda
1 tsp baking powder
1 tsp Xanthum gum
1 cup buttermilk ( i didn't have so i used milk with some lemon juice)
4 tbsp butter (very cold and finely cubed)
1 egg plus 1 egg yolk
Directions:
Preheat oven to 350
Combine all dry ingredients together in a large bowl. Mix together well.
NEXT, mix all wet ingredients in a smaller bowl, expect for butter.
Fold the wet ingredients into the bowl with the dry ingredients.
LAST, add the cubes of cold butter. Use your hands to gently work the butter into the dough, but make sure to leave some chunks of butter still in the dough.
Roll the dough into 6 balls. Flatten into disks on a silpat, or parchment paper on a baking sheet. Brush with a mix of butter and honey on tops.
Bake for 12 to 15 min at 350.
- the original recipe called for 5 tsp of sugar, but I left this out as I never have put sugar into my bisuits before-- I don't think it needed the sugar- you decide though
- also orignal recipe called for guar gum, I left it out, maybe if I had added it they would have held together a little better, they did split a little as you can see in the pics...I may try to add it next time, it was 1/4 tsp guar gum if you want to add it
This recipe doubles as a pizza crust Shauna says, so of course I tried it as cracker and as a pizza crust!!! Of course we ate the pizza too fast and I didn't take pics of it, but I got some cracker pics.


These were really really good. We served them with spinach dip, crab dip, and pimento cheese dip. SO GREAT. J, the hubbie, liked the ones that were the crispiest, said I should have left them in a tad longer so they were all that crispy. As I was serving them with these dips, I liked them as is, a tad flatbreadish, they all had a crisp, but some bend as well.... If you want them all crisp, I recommend baking on a pizza stone as I did, and half way through, taking them out and flipping it, so both sides get totally crispy.
GLUTEN FREE CRACKERS
1 cup cornstarch
3/4 cup plus 2 tbsp corn flour
3/4 cup potatoe starch
3/4 cup sweet rice flour
1 T xanthum gum
1 t guar gum
1 1/2 t kosher salt
1 3/4 cup warm water ( abt 110 degrees F)
1/4 cup extra virgin olive oil
4 tsp yeast (Red star is gluten free)
Gluten Free cornmeal for sprinkling
Seasoning of choice for topping crackers right before baking- I used sesame seeds, garlic salt, cracked black pepper
EVOO (extra virgin olive oil) for brushing
Directions:
Combine Dry Ingredients. Sift them all together till well combined.
Activate the yeast.- Put warm water, olive oil and yeast in small bowl, Stir gently till all combined. Set aside for a few minutes till it bubbling nicely.
Add yeasty water to dry ingredients and mix together. You can do this in a mixer or by hand, I have always felt better doing bread dough by hand, but thats just me.
Do till it comes together and feels soft and pliable.
Set dough aside in a warm place and let rise for an hour. ( I coat a bowl with EVOO lightly, place my dough in it, and cover the bowl with a damp towel. Place it in your oven with the light on, or on top of your stove top with the light above it on)
Preheat your oven to 450 while you prepare your dough. ( or 500 if making pizza)
Pull out your dough and punch it down and form a nice ball again. Divide in two and set 1/2 aside. Work into a rectange or circle form with your hands and then place on wide area of counter that you have covered with plastic wrap.Sprinkle a little cornmeal on plastic wrap, lay your dough, cover with a little cornmeal, then more plastic wrap. Now you are ready to roll our your dough.
This is somehwat slow going, as its not as pliable as regular dough, but if you go slow you can get it really really thin. ( you can use aluminum foil rather than plastic wrap if you prefer and then you can bake right on that on the pizza stone, not as much transfer)
When you are done paint with olive oil, sprinkle with your seasoning, and press it down with your fingers. Next cut our your crackers, using a pizza cutter.
Place it directly on the pizza stone.
Bake for 10-15 min at 450. If you are doing pizza see my directions below.
- I slid it onto a cookie sheet, then inverted it onto my pizza stone and threw the toppings on real fast.
- If you do the aluminum foil method you don't have to do as much transfer.
- For crisper crackers, half way through cooking (7 min) take out and flip the cracker, so that the other side crisps as well as the base.
PIZZA CRUST
The only thing I did differently for the pizza crust is that I did the flipping. Whenever I make pizza crust I ALWAYS ALWAYS ALWAYS, and this is true for gluten free crust too!!!- preheat a stone in the oven to 500 for atleast 30 min.
- cook the crust on this stone for a few min, aprrox 6 min??, then take it out, flip it, add your ingredients to the crisp side, and return it to the oven to finish off--this is only a few more min--3-4
- Broil it that last min,or the 5th min to get a really good melt to your toppings.
Strawberry Muffins and Strawberry Almond Bread


I just have to say Oh My HEAVENS! WOWWEE! This did not have any taste of gluten free. Not at all. I could not taste anything but GOODNESS!
I was blown away.
I mean really really blown away.
These came from Shauna of Gluten Free girl, well I changed some stuff, but mostly from her muffin recipe!!! THANKS SO MUCH SHAUNA! WOW!!!!!!
I hate to bury these down at the end of a post really.
I may do a seperate post on these alone. Its just the start of Strawberry season in Fl I think. We have been getting some really good strawberrys at the grocery store from FL. So we used those. I know I KNOW, not local. But my daughter wanted strawberry muffins.
Gluten Free Strawberry Muffins
10 tablespoons unsalted, soft butter
1 cup white sugar
2 large eggs
2 teaspoons vanilla
1 cup white sugar
2 large eggs
2 teaspoons vanilla
1 cup sweet white sorghum flour
1 cup white rice flour
1 cup tapioca flour
1 ½ teaspoons baking powder
1 cup white rice flour
1 cup tapioca flour
1 ½ teaspoons baking powder
½ teaspoon baking soda
½ teaspoon salt
1 1/4 cups organic whole milk vanilla yogurt
½ teaspoon salt
1 1/4 cups organic whole milk vanilla yogurt
1/4 cup sour cream
1 cup diced strawberries
DIRECTIONS:1 cup diced strawberries
Preheat the oven to 375.
Combine all the dry ingredients together. Set aside.
Cream the butter and sugar together, until just creamed. If you leave the stand mixer running as they are creaming, these muffins will not rise. Simply cream them until combined. Add the eggs, one at a time, mixing after each egg.
Add one half of the dry ingredients, mixing well. Add one-third of the yogurt and combine until well mixed. Add one-half of the remaining dry ingredients to the mixture, and combine. Continue this, alternating the yogurt and dry ingredients, until you have mixed both of them in, completely. Add in vanilla and as many strawberries as you can. Incorporate Fully.
Oil a muffin tin well, then sprinkle a little cornstarch or white rice flour on the bottom of each cup. Fill each space for muffin two-thirds full. Sprinkle the raw sugar over the top if you want too and set them in the oven.
(This recipe will give you enough batter to make two tins of muffins, or close.)
Bake the muffins for about 35 minutes, or until the tops have browned and started to harden, and the entire house smells of warm muffins.
Makes 18 muffins. ( or tons of mini muffins- just make sure you watch, as the time will be less, about 1/2)
- I used some of this same batter to make a mini loaf. I added some sliced almonds mixed in, and a few on top. This took about the whole 35 min to bake. It was wondeful!!!!!
- I am sure you could do a large loaf just as well.
I have been following your blog. It is so informative and well put together. I am very interested in going gluten free and plan on trying many of your recipes. Thank you.
ReplyDelete