One GRITS Journey To Convert Beloved Southern Recipes to Paleo Approved, and Darn GOOD too!

This is my story of how I am striving to change my family's life, nutritionally, for the better. Here in the deep South Keto is just now becoming more known.
After reading Gary Taubes enlightning GOOD CALORIES, BAD CALORIES I was determine to change! Armed with my own two hands, the internet (thank God for AMAZON.com), and all those wonderful blogs and podcasts available now, I am beginning my journey.
Please feel free to join me as I try to adapt all of our Southern Favorites into Gluten Free and Keto Appropriate Scrumptiousness!!! I will try to post all of the good ones, and may even blog about some failures along the way.
Showing posts with label Gluten Free. Show all posts

29 January 2012

Turning over a new personal leaf, Oh and Really Cool Cauliflower "Rice"

I have been living a Paleoish lifestyle for a year now.... but I do make white rice often as my kids and hubbie can use the extra carbs.... The downfall- I end up eating rice too, and I DO NOT NEED the extra carbs, I have been putting on weight ever since going gluten free- I know its from the flours, and rice, and sweet potatoes....  And of course All the experimenting with gluten free flours... I was so excited to learn new ways to make things that  I have gone overboard...Way to many carbs that I don't need.....
I have decided that I have to go back to the basics of Paleo personally for awhile and get this extra unhealthy weight off......
The trick here is to do this for me, while still getting enough healthy carbs in the kids and hubbie!!!!!
 So this brings us to CAULIFLOWER RICE!!!!!
I have read about it, seen in on blogs and paleo cookbooks.... Sounds good in theory, but I really wasn't sure if I would like and and more if the kids and hubbie would go for it...
WHY DID I WAIT SO LONG TO TRY THIS?????? Everyone LOVED IT!!!!!---- recipe to follow
(sincerely apologise for the bad pic---it really was white, not yellow- my camera leaves much to be desired!!!)

26 March 2011

J's Birthday bash- Fettucini Alfredo (GF style)

J's favorite food is Fettuccine Alfredo...
 and H's fav as well- can you tell??

Above is my Homemade Noodle before they went into the sauce...
Here is my Fettuccine Alfredo-
(sorry about my photography, I only got one quick pic before the eating began and my camera always seems to leave lots to be desired!!!!)
J and H both are in love with Fettucini Alfredo...so I have set out to make a darn good home version...
H said it was better than the CaddyShack's (her fav restaurant fettuccine Alfredo.)
I guess I scored, so I am gonna share of course!!!

For his birthday meal we had 
Fettuccine Alfredo, Caesar Salad, Daddy's Shrimp and Roasted Asparagus
I am gonna give all of my recipes, as I really made all of J's fav's, except Daddy's shrimp-he doesn't do the recipe thing, so its kinda hard to share-wish I could, its some of the best shrimp ever!

I finally made a good pasta noodle. I have never been happy with any of my noodles this far. I finally hit the jackpot.

And tonight I taught H to make the Alfredo sauce...
This meal took less than an hour to put together, if you just make the Fettuccine Alfredo alone, well about 30 min and you can be eating! 
If an 11 year old can make it, you can too!
Fettuccine Alfredo
now this recipe serves 10 or 12 people, so feel free to cut it down to size!!)
2 recipes homemade noodles, (see below)
8 oz butter
2 cups Heavy Cream
2.5 to 3 cups Parmesan Cheese
Pepper to taste

and that's it ya'll!!!! So easy peasy!!!

Just melt your butter, add your cream and warm it up, add your cheese and stir till melted together well. Toss with pasta and you are done!!!!!
Unless of course you want to take it one more step and add some grated whole nutmeg- just a few grates, and WOW the yummy factory hits the roof!!!
Homemade Noodles
2.5 oz sorghum flour
2.5 oz quiona flour
2.125 oz potato starch, plus some more for dusting later...
2 tsp xanthum gum
1 tsp guar gum
1 tsp salt
2 large eggs,plus 4 more whole eggs

Combine all of your dry ingredients in the mixing bowl as you are measuring. Give them a whirl to make sure they are well mixed. Next, add your eggs to the dough and turn on the mixer. Let it whirl on a medium for a couple, or 3 min till comes together well. Next, dump out your dough on a work surface and knead it a few times till it binds together in a nice ball. (It will be like a tough playdough-- but still pliable)
If its too wet add a tiny bit of potato starch till its right.
Next, cut your dough ball in half. and with each half cut that into 4 pieces. Cover it with a dish towel as you can only work with one piece at a time...
Now feed it through the pasta machine at setting 1. Fold it over on its self and feed it through again using this method a couple of times.
Move it to setting 2 and do the same thing.
Now setting 3 let it go through as one long sheet a few times. Then go to setting 4 a few times, and you are done.
Fold then sheets over on themselves, cover and do it again with each ball.

If you do not have a pasta maker, then roll each out as thin as you possibly can. Use 2 sheets of plastic wrap to make it easier!!

Now you are ready to toss it into boiling water ( in a couple batches). It will cook up FAST, so stir gently to make sure the individual noodles are broken up, and then take it out in 2-3 minutes. (you overcook it GF pasta will disintegrate on you.)

wow, this is a long post... So on to
Homemade Caesar Salad
4 cloves peeled garlic, chopped finely
1/2 tsp salt
Mash these up together till, well its a MASH...
Now whisk in:
2 tsp fresh lemon juice
1 tsp Worcestershire (GF)
Salt and Pepper to taste
abt 1 inch anchovy paste ( more if you want)
2 eggs ( you can boil them for a couple min if you worry about raw eggs)
Now drizzle in:
1/2 cup good Extra Virgin Olive Oil (EVOO)
Toss with 2 heads Romaine lettuce and 1/2 cup Parmesan cheese ( I like more like a cup of cheese myself actually)
SERVE IMMEDIATELY
My fav version of
ROASTED ASPARAGUS
another EASY PEASY recipe- and very paleo friendly to boot!
more a method, make as much or as little...
Preheat oven to 425.
asparagus, clean and wash and prep by breaking them off where they naturally bend. Dry well.
Spread them out on a sheet tray and drizzle liberally with EVOO. 
Toss with salt and pepper. Drizzle with 1/2 a fresh lemon. 
Shove it in the oven for 15-20 min. (You want the tips a tad crispy, and the rest a tad limp...)
Good now, or cold later truthfully!!!!!
  • for variation, a good sprinkle of parmesan cheese the last few minutes is great! 
  • good without the lemon too, or you can use some spices even....
Daddy's Shrimp- wish I had a recipe to share!!! He is more of a dump a tad of this and a tad of that guy.... I am too really, but I am trying hard to pay attention to my amounts to record them here in recipe form- its tough when you don't usually measure!

21 March 2011

Cafe au Lait Pudding to die for!!!!

So Yummy, we ate half before I remembered to take a pic!!! This is the best one I have, it looked pretty at first I promise!

I found this on one of my fav new sites... Click here and Check it out- her pics are way prettier!!!

Cafe au Lait Pudding

1 1/2 cups heavy cream
1/2 cup strongly brewed coffee
2 T cornstarch
1/4 cup brown sugar
1/4 tsp salt
1/4 cup heavy cream to make Whipped Cream

(This will make 2 servings) 


Mix together all dry ingredients, whisk them well so that there are no clumps.
Cook heavy cream and brewed coffee on lowish heat until simmering.
Once it reaches a simmer add in your sugar mixture.
Whisk constantly for 1 min and then take it off of the heat. 
Pour into your serving dishes through a strainer( I used smallish coffee mugs) and cover on the surface with plastic wrap so that a film does not form. 
Place in fridg to set up-  around 3 hours.

When ready to serve- whip up your cream in a stand mixer. To whip cream start it slowly, then after a minute you can speed it up until you are on high speed. Watch it and as soon as it is thick turn it off and you are ready- EASY PEASY
  • I don't add anything to the cream to sweeten it because the pudding is already so sweet, but you could add a tad sugar to your whipping cream if you wish.

20 March 2011

Gluten Free GRAHAM Crackers!!!!- these rock!

Graham Crackers-
My kiddos have always loved graham crackers...a good snack I used to think....but alas, the more I have learned, the less I am willing to give them processed, glutous foods... So this was another thing on my list of things to learn to make "Healthy" for them....

I have learned that there are a few blogs that give me wonderful ideas that I can just tamper with small twists and come out with a product that I love. The most consistant food blog I have found is www.GlutenfreeGirl.com.
I am a HUGE fan. I have not tried anything that she produced that did not come out beautifully!!!!

So I made her graham cracker recipe, with a few small changes and one rather BIGGER change that turned out so well almost on accident--MOLASSES instead of HONEY as I was out of honey somehow????  HMMM. I think I will like her honey version as well, but these were great... They may be a base to a ginger cookie with some tweaking I am thinking--the ginger cookie I have yet to figure out, but I WILL...


GF Grahem Crackers

2.5 oz sorghum flour
2.5 oz superfine brown rice flour
2.5 oz tapioca flour
2.5 oz sweet white rice flour
1 tsp cinnamon
1 tsp baking powder
1/2 tsp xanthum gum
1/4 tsp guar gum
1/2 tsp salt
3.5 oz COLD unsalted butter ( 7tbsp)
3 oz good quality dark molasses ( or used local honey here)
3 tbsp cold water ( may end up needing up to 6 tbsp)
Cinnamon sugar to sprinkle on top (optional)

DIRECTIONS:
Combine the dry ingredients in a food processor and give it a good whirl to combine well.
Cut in the butter. - cut your COLD butter into small pieces and add to food processor. Pulse until incorporated- it will look coarse and sandy.
Finish the dough by stirring Molasses and 3 T water together until mixed well. Add molasses water to food processor while it is spinning. Let it whirl around until a ball forms. Open and feel the ball in your hands, if its too dry add in some more water SLOWLY and keep checking- may need up to 6T total water.
NEXT refrigerate for 15-20 min.
Preheat your oven to 325 degrees F.
Line a sheet tray with parchment paper. ( you will really need two)
Now, divide dough into two parts and set one aside, rewrapped. Roll the dough into a rectange shape. In order to do this I placed my dough on top of parchment, and covered it with plastic wrap and then rolled it out. It is much easier to roll out GF dough using this method!.
When you have it as thin as you want it ( no thicker than 1/4 in for sure) place the parchment paper with your dough on your baking sheet tray. Peel off the plastic wrap and now you want to score it in the shapes you want it to be- small cracker sized, bigger like actual graham crackers?? Next you want to prick holes into the cracker in a regular pattern. Back in the fridg for 15 min to firm up...
Now BAKE till browned and starting to be hard, 15-20 min. Allow them to cool on the sheet tray until they are cool and hardened to touch even more.. this is about 30min more...
Repeat with second dough half. ( I rolled out both of mine and then placed into oven at the same time ) 

Another small tip-- I ALWAYS bake on my pizza stone. I pretty much just leave it in the oven almost all of the time. Just heat up the oven with it inside, then place your sheet pan directly on pizza stone- I think it makes everything just that little bit crispier) 
If you don't have a pizza stone and are interested in BAKING at all- go get one, its so worth it!
 
Eat, Dunk in milk? 
Dunk in applesauce or yogurt? 
Make S'Mores for a special treat????

I am wanting to try these with small cut outs to make cute little bit size cracker snacks for the kiddos..Maybe next batch and then I will update with some pics!!!!

I am also wanting to try to adapt this with more spices into Gingersnaps perhaps??? Will update!

12 March 2011

Strawberry Bliss Birthday For CareBear (Gluten Free of Course)

Of course the birthday girls day starts out with breakfast! She has requested strawberry everything for her birthday. So we have started the day out with Warm Strawberry Cream Scones with a Strawberry Icing Glaze- yes every bit as yummy as they sound! Truley!!!! The day started off well!
Now I need to go bake a Strawberry Cake with Strawberry Swiss Buttercream Icing.

Strawberry Cream Scones, with a Strawberry Icing Glaze (gluten free)
and then we made the cake:

Strawberry Cake with Strawberry Buttercream (GF)


I have to say this turned out well, but getting there was not easy... I tried to make (ICING TAKE ONE) Swiss Meringe buttercream, the egg white/sugar mixture WOULD NOT get fluffy- Let it go for ages in my kitchenaid, it would not get to a marshmellowing thickness, just a runny mess!!!!! AHHHHHHH!!!!
 ICING TAKE TWO- So I made a cream cheese strawberry icing---and Carebear did not like it-- I thght it was great, but as she doesn't like cream cheese--WHAT WAS I THINKING???
So on ICING TAKE THREE we finally  succeeded with this-
Strawberry Cake with Strawberry Buttercream
1 GF Cake mix ( I used Betty Crocker)
1 3oz box strawberry jello
1/2 cup finely diced strawberries
1/2 cup coconut oil ( heated if needed to make it liquid)
4 eggs, seperated
1/2 cup hot water

Directions:
Dissolve jello in hot water.
In first bowl beat egg whites until fluffy. Set aside.
Add egg yolks and the rest of the ingredients to the Jello and Beat for 2 min in the mixer ( I used a Kitchenaid)
Fold egg white into cake mixture GENTLY, and keep folding till all combined well.

Grease 3 9 inch cake pans with butter, place a parchment sheet that you have cut out in a circle the same size as pan into bottom, make sure it is well buttered as well on both sides, and then dust the pan with some flour ( i used one of my AP gluten free flour mixes) This step is critical to make sure that your cakes will come out of the pan!!! Do this for all three pans. and then you can divide your cake mix equally into all 3 pans.
see how the cake came right out!!! and then I peel the parchment off...
 

11 March 2011

Homeade Yogurt How to


First you need to obtain either a yogurt starter in dry form or you can go the easiest route and just buy some yogurt from the store that has live cultures in it and use a Tbsp of it as your starter.
( It is VITALLY impt that the yogurt you buy has LIVE cultures in it, so read the container!!!!- often the yogurts in the store have been pasteurized to the point where the yeast cultures have actually been killed off. SO PLEASE CHECK or you will end up with nothing but a jar of milk for you effort)
I will say I like to use Stoneyfield Organic Plain Yogurt- I like its creamy texture, and it has numerous strands of live culture. I have also used Live Acidophilis Raw Milk Yogurt from our Local Natural Food Stores successfully, it was a little runnier.
  • I did also try and use a dry starter and it worked, but I did not like the taste as well, it was much less sweet naturally, and as I do not like to add any sugar I look for a naturally sweetish taste in my yogurt.
  • I have tried a few different methods of making yogurt at home, I will give you a breakdown review of each and let you know which is my favorite when we get to the end step in the recipe, as the first step is virtually the same.
Second, you need to decide how much you are going to make. Generally you should make it at least a quart at a time, but you can do as much as you wish. So gather your supplies- glass jars of whatever size you wish with tops, milk ( any kind), and a thermometer that you can measure the temperature of your milk with, and a pot that you can heat up you milk in.
HOMEMADE YOGURT
(I will base this on a recipe for making 1 quart yogurt.)
See how thick it is on the spoon- thats one I strained through some cheese cloth, the yogurt in the dish is my strawberry version-its really thick too even with the pureed addition (see my tips at the bottom)
  1. Measure  1 quart milk and pour into your heavy bottom pan. Place on stove top over med-low heat and bring to a temp of 180F. Maintain this temp for 15- 20 min. Stirring very often as to not scald your milk. You want to bring it up to temp very slowly also.
  2. Next set aside to come down to a temperature of between 100 and 110F.  ( a fast method here is to fill a colander or large bowl with ice and place your milk pan into it- your milk will come down to temp very fast-watch it closely!)  Now you are ready to add your yogurt starter. You only need to add 1 T of live culture yogurt and stir well to distribute.
  3. Now you need to place it in a warm place where is can maintain a constant warm temp ( ideally btwn body temp and 110 degrees) until it becomes yogurt. It is said that it takes between 4 and 15 hours. Mine seems to take at least 12. I recommend checking it around the 8 hour mark and then in increments. YOGURT DOES NOT LIKE TO BE JOSTLED OR DISTURBED-this is a biggie.( I think 4hrs may work if you have a yogurt maker machine??????)
  4.  
OK-here are the methods I have tried to incubate my yogurt---
in order of my fav to least fav

1. Get a small cooler, or insulated cooler bag in my case, and place your quart, or quarts or yogurt in it. Next fill however many quart jars necessary to fill entire space of cooler surrounding your yogurt quarts with the hottest tap water you can. Every 4 or so hours check your coolers heat level and refill the water jars with hot water to keep the heat in your cooler a nice constant warm.  This works really well and ends up with the creamiest result in my opinion!!!!

see that cooler bag by the window, thats my yogurt "incubator"
2. Place your quart in a crock pot. Fill your crock with hot hot tap water and place in your crock. Now wrap your crock with a warm blanket or towels all around and on top. As with above, change out water if it cools... I did not get great results with this one....
This is my crock pot wrapped with a blankie!
3. Place yogurt quart jar in your oven with the pilot light on. Leave it undisturbed and check periodically. This did not work well for me, it took over 24 hours and thus gave me a very tart yogurt. It did work, but I don't love a tart yogurt as I don't add any sweeteners. ( I read some where that if you replace your light in your oven with a 100Watt bulb for yogurt days it will work???? also if you have a gas oven this method may go better???)
My Tips and Tricks

  • My fav add in--  Bourbon Vanilla Bean Paste--- YUMM!!!!!-- and it is GlutenFree
  •  and sometimes I add pureed fruit on a rare occasion
  • my kiddos like a sprinke of cinnamon on top, or a drizzle of honey
  • TO MAKE IT SUPER THICK AND CREAMY here are a couple modifications--- during the heating the milk step ADD 1/3 cup buttermilk or regular milk powder and make sure to heat the milk the full 20 minutes.
  • Also remember- DO NOT AGITATE YOUR YOGURT WHILE ITS SETTING UP, THIS CAN LEAD TO GRAINY OR LUMPINESS.
  • If you don't mind your yogurt a tad thin, you can skip the maintaining at a high temp for 20 min- just get it to 180, then bring it down to 110. I have done this quite successfully- (but as I like creamier texture I ended up straining these batches- which makes a SUPER creamy product, but you end up with a lot less yogurt, and a lot of whey--which if you will use the whey is not a bad thing!!!!!)

10 March 2011

Southern Fried Chicken Fingers- Gluten Free Parmesan Crusted Style

 Parmesan/Whole Wheat GF Chicken Fingers
( my chicken fingers have an orangish oil here because I used Palm oil as I was out of coconut oil the day I made these- just so you know!!!)


My kids have always LOVED chicken fingers, what kid doesn't???? So I have made many versions of the beloved chicken finger at home.
This is my first Gluten Free Chicken Finger.
(I served these with some homemade tomato sauce and broccoli slaw salad (recipe for that to come soon)

Gluten Free Southern Fried Parmesan Chicken Fingers
(this is more of a method than a recipe)
Chicken breast, cut up into bite size pieces
Finely grated good quality parmesan cheese and Gluten Free Breadcrumbs- (throw GF bread in a food processor and make breadcrumbs) combined together in a dish - add some salt/pepper and italian spices together here
Egg and Small amt Heavy Cream whisked together and placed in a wide dish
Heavy cream in a dish
Now you are ready to get started...
  1. Dredge chicken in Heavy Cream.
  2. Place in Breadcrumbs and coat lightly then place into egg mixture.
  3. Finally place back into breadcrumbs and make sure to coat well.
  4. Heat coconut oil to a high frying temp. Brown each side of chicken well. Drain on a plate covered with papers towels and Then place onto a well greased baking sheet and into a preheated oven at 350 F. Cook until cooked through, usually about 7-10 min. (Be careful not to overcook or they will be tough.)
Dipping Tomato Sauce-  Saute some finely diced onion and a clove or two of garlic. Add home canned, or store bought crushed tomatoes. Throw in some Italian spices and a bay leaf. Simmer at a low slow temp for at least an hour, a couple would be better. If you have a rind from a good Parmesan in your freezer throw that in while its simmering, it imparts a great flavor. The longer you simmer the thicker it will get and it will get a stronger better flavor. Now take out the bay leaf and the Parmesan rind and discard them. Next, using an immersion blender blend the sauce till all parts thoroughly combined. Now its ready to serve as a sauce- great for dipping sauce, chicken parm sauce too!

My Rant of Why Gluten FREE is A MUST for a Healthy Long LIfe, Plus a RECIPE for AMAZING CHEESE CRACKER-for real Ya'll

I am proud of these puppies if I do say so myself. And these are almost Paleo- well so close, so a good cheat when you need a little crunch.
As I have been saying, I am going closer to Paleo for myself, and a little less stringent with my family with the lower carbs, but very strict with the gluten free. I really feel that there are major health benefits for everyone to be gluten free, regardless of whether you have allergy reasons. The anti-nutrient properties of Flours, and really all gluten products are just astounding...so INFLAMMATORY to our bodies...no wonder so many people have some kind of issue or another related to gluten with more and more popping up daily at doctors offices. Gut permeability, LEAKY GUT, which is what is so often caused when we consume gluten products in our diet can lead to SO MANY health issues. More and more about this is being discovered in research, and in fact they are actually in production for a DRUG for leaky gut as I write this. As they found out that LEAKY GUT is an issue, they went to work on how they could manipulate this issue pharmacological. I have mixed feelings here. When you stop things from crossing this barrier, it may very well start to heal, but what all is getting stopped, could the good nutrients get stopped by not natural, pharmacologically produced drugs also???? And on the opposite spectrum, now that they know how this barrier works, they are also in formulation of drugs to actually CAUSE a leaky gut. That right folks. The idea is if they cause this leaky gut situation then the drugs they create can then cross this gut barrier into the blood system, solved x,y, or z problem...but at what cost???? WE already know that when a leaky gut occurs all sorts of issues can occur, GI problems, skin issues such as eczema, possibly its being linked to metabolic syndrome, and the list goes on. Its a scary world out there!!!!! OK, that was a heck of a tangent....
This was supposed to be about
OUTRAGEOUSLY GOOD GLUTEN FREE CHEESE CRACKERS
(adapted from a recipe on www.lifeasaplate.com)

2 c almond flour
1/2 c whole wheat GF mix of choice
1 1/2 cups good quality cheddar ( I used hoop cheddar)
1/4 tsp sea salt
1/2 tsp baking soda
4 tbsp finely grated Parmesan Regiano 
2 eggs
3 T olive oil ( or coconut oil )

Mix together flours, salt, and baking soda. 
Add in cheeses.
Add in the egg and then slowly drizzle in the oil.
Beat slowly until mixture is doughy. Should be mostly firm and make a ball easily.
( I do all of this in my Kitchenaid mixer.)
  • Preheat oven to 350degrees F.

Place a long sheet of aluminum foil on your counter, rub with small amount of cooking oil. Place your ball of dough on center of sheet and flatten to rectangular shape with your hands. Cover with sheet of plastic wrap. Slowly roll out the dough as thinly as possible in a rectangular shape. Remove plastic wrap and using a pizza cutter or ravioli cutter lightly cut out your crackers into the shape you want them, as in above picture. Now on each individual cracker using a tooth pic, or skewer poke hole in each in a pattern ( this allows for more air circulation therfore crisper crackers). 
Next you will place the aluminum foil with cracker dough directly on a preheated baking stone in your oven and bake for 10 min in your oven, or until darkened and crispy. ( If you don't have a stone, just place on a baking sheet.)
Enjoy!!!!!
I swaney ya'll, these are the real thing- they are so yummy!!! My kids, my hubbie, my parents, my friends, all gave a huge thumbs up!!!!

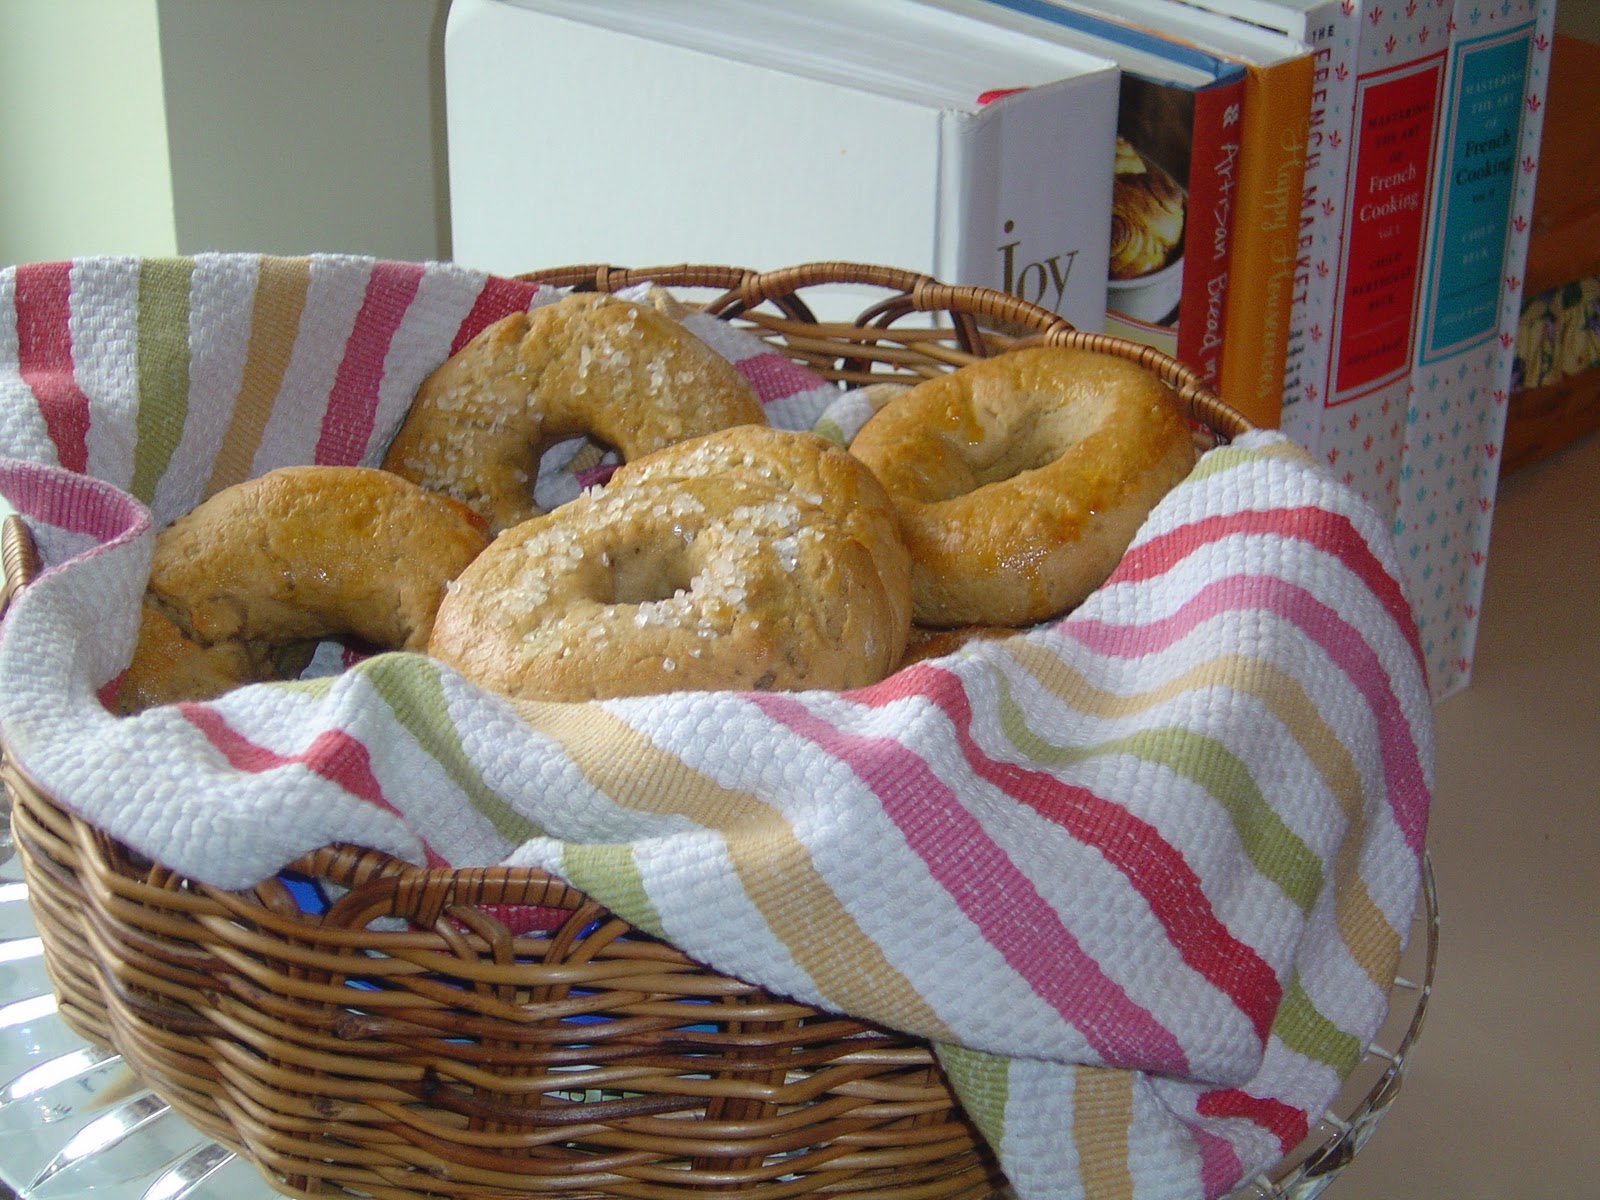
Chewy, Sink My Teeth into it- The Successful Gluten Free Bagel- For REAL!


Sometimes a girl just needs a hot, fresh, chewy cream cheese lathered bagel to sink her teeth into...can I get an amen??

Now, I am doing a Paleo lifestyle for the most part, which is gluten free, and also pretty low carb, so bagels are not so much on my plate very often... but as I said above sometimes a girls gotta go where a girls gotta go. Life is too short not to indulge once in awhile! ( within my healthy gluten free and mostly paleo parameters of course)
But today BAGELS, BAGELS, BAGELS called my name so I set out to create ones I could enjoy in good conscience.


The Chewy, Sink your Teeth in Gluten  Free Bagel
(adapted from an old Cooking Light magazine)

1 (12oz) can gluten free brown beer - I used Redbridge
1 cup water
2 1/4 tsp yeast (GF)
1 large egg white, lightly beaten
4 1/2 whole wheat gluten free mix of choice
**see bottom of post for exact mix I used today**
1 1/2 tsp salt
4 cups water
1 tsp brown sugar
1 tsp yellow cornmeal
1 tsp water
1 large egg yolk
any toppings- 1 tsp sesame seeds, 1 tsp poppy seeds, 1 tsp sea salt, 1 tsp cinn/sugar mix, anything you want to come up with!!!!

1. Heat 1/2 c beer and 1 cup water over low heat in a small, heavy saucepan to btwn 100 and 110 degrees F. Combine Beer mix and yeast in large bowl, stirring until yeast dissolves. Let stand 5 minutes. Stir in egg white.
2. Weigh flour. Add flour and salt to beer mixture in KitchenAid mixer ( or wherever you are mixing)  and stir till a soft dough forms. (I let mine go in mixer for approx 5 min as with GF flours we skip the kneading step)
3. Form into a ball and place in a clean pre-greased large bowl. Cover and place in a warm spot and let rise for 1hr 15min or until double in size (mine never did double, but when I indented dough with my finger it did not spring back so I knew it was done)
 (the dough ball will look something like this)
4. Punch Down and reform in a ball. Cover again let it rest for 5 min.
5.Turn dough out onto a lightly greased surface ( use a little olive oil). Divide dough into 12 equal portions. Do this by cutting in half, then each into half, then each in half again. (You can make larger bagels if you so desire by making less balls, say 10.) Cover all portions back in your bowl.
6. Working with one portion at a time form into a ball and then using your finger make a hole in center of each ball. Gently stretch to make whole approx. 1 1/2 in wide. Place bagels on a baking sheet coated with olive oil, and coat each bagel by turning it as you set it on baking sheet. Cover with your towel, or plastic wrap, and let rise for 10 min. May not rise much at all-thats ok
7. Preheat oven to 400 F
8. Combine remaining beer, 4 cups water, and brown sugar in a dutch oven. Bring to a boil, reduce heat and simmer. 
9. Gently lower a bagel into beer mixture. Cook 30 sec on one side and then 30 second on other side. Turn and Remove with Slotted Spoon. ( do not leave in too long or GF dough will start to disintegrate)

 Transfer each to a wire wrack that is coated with olive oil or cooking spray to sit as you do each one. (I did 2 bagels at a time) At this time paint each bagel with egg yolk/water mixture ( to make take 1 egg yolk and 1 tsp water and whisk together). Now you can sprinkle each bagel with any topping of 
choice, or leave plain.
10. Place directly on a preheated baking stone that has been sprinkled with gluten free cornmeal.
 BAKE at 400F for 17-25 min. You are looking for a brown all over bagel. (each oven varies, and using a baking stone or not makes a difference so just watch yours closely after the 17 min. mark- mine took 23.)
See how they are browned all over, this is what you want.


See the crumb???? Its chewy!!!! It absorbs the butter beautifully!!! This one was my sons, I myself prefer cream cheese!!!!!

I hope someone else tries these and loves them. I will be makin them weekly probably!!!! My kiddos love them, and it will give them some breakfast carbs that they can have some days with their eggs and bacon combos..... I do tend to give my kids carbs much more often than I allow them for myself-- I feel like they run off the energy and need them.
  •  I did use a bit of a different GF flour mix in this one than than on the link I gave above- but as you will see on the post I linked there are lots of ways to change up the whole wheat GF mix!!!!!
  • My exact flour mix I used today if you want to copy exactly-
***100g sorghum flour, 100g corn flour,100g quiona flour, 200g amaranth, 200g brown rice flour, 150g tapioca flour, 150g potato starch***

24 February 2011

Jack's "foe Oatmeal" - Gluten Free Cinnamon Rice Pudding

My son Jack, he likes consistancy.

They boy has had Oatmeal, yep your basic Oatmeal, for breakfast for years. Atleast the last five years, day in and day out,
Me-
What would ya'll Like for Breakfast today?
Jack-
Oatmeal please, momma. ( for YEARS-every day)

So going gluten free, changing to our paleo, gluten free lifestyle is a big change for this boy.

My husband suggested Rice Pudding actually. I thought, yes, that could work maybe???
I mean, if I make a super creamy batch, a large bactch, it could last all week?

He was a happy camper!

A thumbs up mom.

His favorite was is when I mix a couple of grannny smith apples in that I have cooked down in grass fed butter and cinnamon.
The other two liked it better with fresh fruit or raisens mixed in...
I have to say, the apple version was YUMMY!!!! I could go with it for dessert easily, not just breakfast. Its now in our rotation though. A break from the eggs and bacon, and a way to get some extra carbs in them here and there!!

Foe Paleoish "oatmeal"-- Rice Pudding

<p>This is a wonderfully thick, creamy rice pudding that can be served cold or warm. It can be a dessert, or a breakfast. </p> <p>I created this because my son loves oatmeal. As we have gone gluten free I needed an alternative. I know, you can get ...

See Foe Paleoish "oatmeal"-- Rice Pudding on Key Ingredient.


I do realize ya'll that Rice is not Paleo. Its a grain. But its gluten free, and on the scale of no-no's and the damage these things do to our bodies, I feel that white rice is allowed now in then in my families diet. I feel like my kids work hard and play hard and need extra carbs here and there. I feel like fructose is a worse culprit truley, and I am struggling with that more myslef.... Taking fruit away???? I just don't know???
Any thoughts ya"ll???
For now I am keeping apples and berries in my kids diet. But trying not to let them gorge on on them as I used to.....
So much to learn......

17 February 2011

Ginger Cookies-- Just like Grandma made???

 Today is my first attempt at baking cookies paleo style... I wanted a treat, with no sugar and no grains.... Something my grandma would be proud of. 

Will these stand up to the test?  Whats the Verdict?

  We shall See. I have had some WONDERFUL crystallized ginger in my pantry for almost a month now and I have been ITCHING to use it. So I gave these a try:

Ginger Cookies ( as good as Grandma's??)

3 oz crystallized Ginger (add more ginger if you’re a big ginger fan)
1 c almond butter
1 egg
1 t cinnamon
½ t allspice

Preheat oven to 350ºF. Line a baking sheet with parchment paper or a silpat. (NOT WAX PAPER, it will stick!)
Finely chop the crystallized ginger and add to your mixer. Add the rest of the ingredients and thoroughly mix–about 3 minutes.
Use your hands to form about a tablespoon of the dough into a ball. Place it on the baking sheet and using a fork do the criss-cross method like peanut butter cookies, or just press down with the palm of your hand. (There is no baking powder or baking soda in this recipe, the cookies won’t go anywhere when they’re baked in the oven)
Bake for about 12 minutes.

 The Verdict:  Sadly, not as good as Grandma's BUT I have to say I did just down 4 of them, so not so bad either...will keep tinkiering with this one I think.


They did look cute on my cheese plate though!!! Hey, cookies can go there too!!!


10 February 2011

Gluten Free Pumpkin Muffins

Still in search of additions to my kids breakfast, lunch, snack repertoire as I embark on the journey to ever better nutritional health for our family....
What can they have for snacks other than veggies, nuts, organic jerky occasionally, meat roll ups... VARIETY is the SPICE OF LIFE after all, right?
Speaking of spice, Pumpkin is one of my all time favs to work with, always has been. So it makes sense that as I embark on the wheat free, gluten free journey I would turn to pumpkin. I found a recipe at Tropical Traditions for Pumpkin muffins, I really didn't tweak much at all.
Gluten Free Pumpkin Muffins
1/2 cup coconut flour
1/2 tsp baking powder
1 tsp cinnamon
1/4 tsp cloves
1/4 tsp allspice
1/4 tsp nutmeg
1/2 cup pumpkin puree
6 eggs 
1 tsp vanilla
1/2 cup coconut oil, melted
3/8 cup pure maple syrup ( abt 3 1/2 oz)
pinch salt

Preheat oven to 400F. Grease muffin pan with coconut oil or line with paper liners.
Sift dry ingredients together.
Whisk wet ingredients. Gradually Whisk in flour to pumpkin mixture until no lumps remain.
Divide between 12 large muffin cups, or 36 mini.
Bake 12 min or until toothpick in center comes out clean for large.

Optional Cream Cheese Frosting:
8oz cream cheese, softened
1/2 c butter, softened
1/4 c maple syrup or honey
1 tsp vanilla extract

Combine all and Beat in electric mixer till light and fluffy.

Paleo Pancakes

In our Paleo adventures as a family, one of the hardest things I have found its finding breakfasts that break out of the eggs realm. The easiest, and probably healthiest choice for our children for breakfast is eggs. Scrambled eggs, poached eggs, egg muffins, eggs with sausage, eggs with bacon, eggs with sweet potato hash... Well my son Jackson, he could have eggs and bacon every single day and he would never complain.
Caroline on the other hand. Well lets just say she gets tired of eggs, eggs, and well more eggs.
I am not strictly straight Paleo, more the PANU variety so we do eat dairy. Whole milk yogurt and berries gets thrown in to our breakfast mix sometimes. However, I still was in search of more variety....

So I decided I need to give gluten free baking a try. I have to say I was very wary... I previously LOVED baking bread. HUGE FAN. Will these other flours stand up at all, or will it just all FLOP???

My first ever recipe I tried was for Paleo pancakes, a recipe I adapted slightly from one I found browsing sites on the internet. Before I give the recipe I have to say, I am a little leary of almond flour, as almonds are higher is omega-6 and I am really a little worried about this. I want to work on the 6:3 ratio and don't want to introduce things high in omega 6 to my family's diet very often. That being said... WE NEED SOME BREAKFAST VARIETY SOMETIMES PEOPLE!!!!!!---- so.....
without further ado..
Paleo Pancakes
 2 eggs
1/8 cup water
1/4 cup honey
1 tsp vanilla extract
1/2 cup almond flour
1 tsp baking powder
1 tsp cinnamon
Blend wet ingredients in blender. Add dry ingredients to blender and pulse until well blended. Let rest in fridg 20 min up to overnight. Make on Griddle using coconut oil or butter, over med-high heat.     ( this is a rather thick batter,- it works!- but if too thick thin out with a little more water)

To DIE FOR Pumpkin Paleo Pankcakes

This was my first go at my own gluten free, no wheat baking recipe. I wanted some really good breakfast food, something other than eggs and bacon for the kiddos once and awhile....
I  had made regular Almond Flour pancakes, mainly from a recipe I had seen, see my version- Regular Paleo Pancakes. They were good, but I wanted something more, shall we say DECADENT? These hit the spot!!!---
I PROMISE- make these suckers!!-whether you are gluten free, paleo or not at all. THEY ARE tO dIE fOR!!!! YUMM!


Pumpkin Paleo Pancakes
2 eggs
1/2 cup pumpkin puree ( not pumpkin pie mix)
1/4 cup plus 2 tbsp whole milk
1 tsp vanilla extract
2 tbsp maple syrup ( the real stuff)
1/2 tsp baking soda
1 tsp cinnamon
1/2 cup almond flour
1/4 cup coconut flour
Blend all wet ingredients in Blender (or a food processor) first. Next add all dry ingredients and pulse until well blended and no lumps. Place in fridg to rest for at least 20 min to overnight. Now you are ready to make pancakes!!! I made mine silver dollar sized. ( This is a thicker batter, thats ok, it works!- if its too thick, as coconut flour does soak up the liquid, add a little more milk as needed)
ENJOY!!!
Here is mine on the griddle... the smaller you make them the easier they are to handle! - (just a hint)

Print Friendly